Teaching the Elements of Art - one by one
One of the ways in which art can be taught is by teaching the elements of art one by one. In the Art Overview I have described the elements of art.
On this page, I will give some examples of how art can be taught one element at a time.
The Elements of Art: LINE
- Have you ever tried to draw a circle or a very straight line? Not trace one or use a template or ruler. No, just free-hand. It isn't that easy, you know, and those who wish to draw need to practice the art of drawing with lines.
- Very young children can draw lines for water or in a background of trees, inside boxes, a sky-line, stems on flowers, on clothes and so on. These initial exercises are teaching control of young hands.
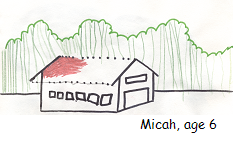
- Older students need to control the use of line to show shadow and texture and the development of three-dimensional forms.
- Practice drawing lines as an expression to music being played. Vary the moods of music.
- Practice drawing varied lines- straight, curved, ripples, cross-hatching.
- Practice "blind contour" drawing. Cover your hand, and draw an object under observation in a continuous line. Don't look down. Practice the object a few times. Then, continue contour drawing, studying the line of the object, but this time not "blind". Progress to more complex forms.
- Analyse paintings and sculptures of famous artists. Study the way the artist has used Line as one of the elements of art to emphasize certain aspects and to create unity and perspective in the composition.
- Take note of the paintings below by Vincent Van Gogh. He has an expressive, overt use of line. These paintings are great to copy to enjoy the swirls and movement which he clearly depicts in his art. This can be done with pen and ink, lead pencils, crayons and also soft pastels.
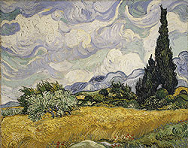 "Vincent van Gogh: Wheat Field with Cypresses (1993.132)". |
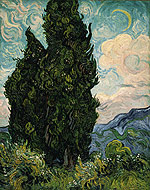 Cypresses, 1889 |
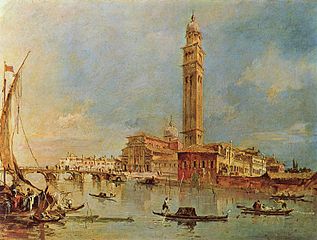 |
Venice |
- Drawing ellipses are an essential part of drawing faces, tops of bowls and jars, bottles and animal shapes.
- Another art idea is to enlarge small objects (such as a bolt, a comb, a crumbled piece of paper, or textured material) and study the lines carefully. Enlarge this object on a large piece of paper.
The Element of Art: COLOUR
- How do you teach colour as an element of art?
- Make your own colour wheel;
- Paint freely and observe and talk about the way the colours change as they are mixed.
- Mix colours on the palette; Experiment.
- Mix colours as children finger paint. Experiment.
- Drip paints onto a wet sheet of paper and take note of the effects of colours mixing.
- Observe and experiment with colours as they are placed side by side. Use paints or paper to experiment by placing different coloured circles onto a standard background square. Take note of the apparent changes that are brought about when colours are placed beside eachother.
- Make two similar drawings and use warm colours in one drawing/painting and use cool colours in the second. Take note of the effects on the viewer.
- Learn about analogous colours. Use the colours which are next to each other on the colour wheel to create harmony in a picture.
- Use playdough or plasticene and create animals and scenes. Take note of what happens to the colours when they are mixed.
- As you study Colour as one of the elements of art, study the works of great colourful artists such as Rembrandt, Van Gogh, Seurat, Matisse. Use their works and copy from them.
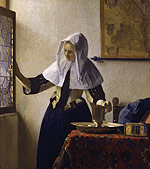 |
Young Woman with a Water Pitcher, ca. 1662 |
|
Vétheuil in Summer, 1880 |
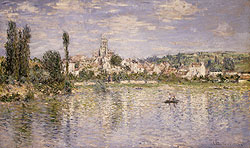 |
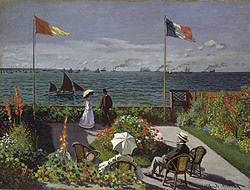 |
Garden at Sainte-Adresse, 1867Claude Monet (French, 18401926) |
- Find and learn about complementary colours from the colour wheel; Use them in drawings to show shading and for use in a background. In the fold of a ribbon, or the underneath of an umbrella, or the background of a character or object, the complementary colour can be used to keep your work colourful and interesting. (rather than just using black)
- Another art idea is to find objects or drawings which are one particular colour (eg. red). Then compare them with what others have found. Can you order the colours in a sequence to show value - from the lightest to the darkest?
- Paint a number of pictures using only 2-3 colours to show different emotions. Paint an "angry" picture. What two colours will you choose to use? Paint a "sad" picture. Which colours will you use now?
- Want an idea which is great for kids who don't like to hold a brush or pencil? Try this:
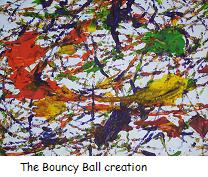
Place primary colours on a paper in a shallow drawer. Then place marbles or bouncy balls in the drawer and move the drawer from side to side. Take note of the colour changes as colours mix and stand alongside eachother. The finished creation can also be used as a print source. (Place a paper on top of it to view another picture.)
The Element of Art: TEXTURE
- Find examples of use of various kinds of texture from magazines. Cut them out and paste them in different arrangements.
- Show texture of objects by adding curved lines around the width of a tree, knots and lines in the trunk of a tree, short strokes for fur, hair, whiskers, and so on.
- Another art idea we have all done is to make pencil/crayon rubbings on trees, pavements and various surfaces.
- Use varied textures to paint on and use as a print. For example: Dip sponges, sea sponges,in paint and print on material or paper to achieve different effects. Either use it to make a picture or just use for an abstract patterned effect. Other ideas include: rope wrapped around wood or a tin which can be rolled in paint and then over paper; string dipped in paint and draped over a page; potato prints; other vegetable prints; lino prints in which linoleum has been carved out to make a relief picture and give its own textured effect.
- Splatter paint with toothbrushes dipped in paint, and flicked over a page in order to give a splattered texture.
- Use large amounts of paint on a page;
- Use a palette knife with oil or acrylic paint to give raised textured pictures.
- Use fabric paint- and experiment with flat and raised drawings.
- Use powder paint mixed with soap.
- Use powder paint (can also use acrylic, but powder works better) mixed with dishwashing liquid and some water. Blow bubbles with straws and allow the bubble mixture to fall over the container on to the page. It creates wonderful texture and patterns as it dries.
- A friend has told me beating lux soap flakes with a beater makes an excellent medium for sculpture. (I haven't tried it, so I'm not sure of the details of this, but it sure sounds like fun!)
- Use a sculpture as a basis for drawing and learning to shade and create texture.
The Elements: SPACE AND MASS
 |
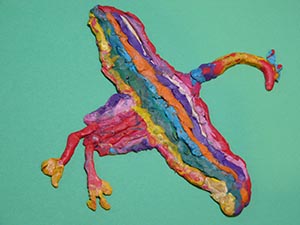 |
- Create 3Dimensional forms with straws or toothpicks and plasticene or playdough. Discuss the space inside the object as well as the space it takes.
- Make sculptures from a varied of different materials- cardboard, woodscraps, balsa strips connected with string, elastic bands and glue and you may even use cellophane as inserts in the spaces.
- Create box sculptures- arrange shapes to experiment with mass distribution- what is the strongest structure?
- Make structures which are delicately balanced using all sorts of odds and ends. - forks, corks, bottles, buckets and so on.
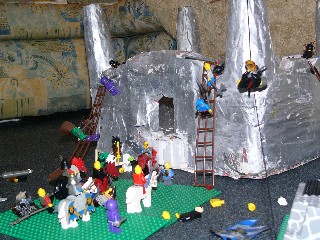
- Create sculptures as history/science projects- animals, famous buildings, geographical features (mountains, volcanoes, valleys), villages, and so on.
- Work with clay. Scoop out sections of the clay. Observe light and shade of the structure by using a torch and shining it from different directions. Draw the sculpture a number of times showing how the direction of light affects the light and shadows.
- Explode a design. Divide a sheet of dark paper into sections and place these sections on a white background. Pull the sections apart leaving small white spaces between the dark forms; Then increase the white spaces. Take note of the changes. Do this also with curving lines.
- Cut out different shapes from coloured paper and drop it from a height onto white paper. Observe the patterns you make and the spaces between the shapes. Continue until you are happy with the arrangement and glue. What picture can you see in the shapes? What picture can you see in the space?
- Make an outline picture with crayon and fill up all the space around it and between it with colour.
- Use lines to cover an entire page. Colour each intersecting space with colour, dots, or lines.
- Drawing a still life picture. Use a cut-out frame to find the composition which has a balance between the shape and the space. (the positive and the negative space)
- Do the still life picture again. Choose another perspective which focusses on the space. Use the cut-out frame to help you choose your arrangement of composition.
- Try this again, leaving some areas without colour. Take note of the spaces and the effect they have.
The Elements of Art: FORM
- Shadows help to create depth and also form to pictures.
- Practice drawing with curved lines to show specific features - round balls, fruit.
- Draw geometric shapes;
- Make three dimensional shapes -cubes, pyramids, spheres by adding perspective and shading.
- Practice one-point perspective in which a boxed shape recedes into the distance and meets at the horizon line at a point called the vanishing point. Make these boxes into house structures, keeping all vertical lines straight up and down.
- Continue perspective drawing with buildings on each side of a street, all lines converging to the horizon line.
- Practice altering the horizon line and drawing to it with different shapes
- Draw from two-point perspective in which there are two vanishing points. Create a house this way.
The Elements of Art: VALUE
- Practice drawing with pencil, charcoal, and pen and ink drawings to focus on value and shading.
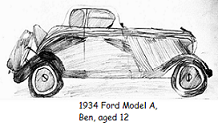
- Another art idea to explore Value as an element of art, is to use one colour and make a colour chart by starting with the saturated hue at the top of the page, and gradually changing its value by adding white, a small portion at a time. Paint each new colour under the previous one.
- These colours could be painted on to different cards and made into a game in which one child makes the monochromatic cards (puts numbers on the back of the order) and gives it to another child who then needs to order it correctly from the lightest to the darkest.
- Use these monochromatic colours to make a picture.
- Paint 6-7 containers white and use these to make a still life arrangement. Draw them on a gray paper with black chalk, using white for highlights.
- Use a light source on this or another set of objects to create shadow and use this as an arrangement to paint with a monochromatic scale.
- Take a section of a photograph or picture, enlarge it and use it as a model to copy. The children should not be able to identify the object they are copying. Look especially at the dark and light patterns. Then show the children what the complete photograph or object was.
- Copy a picture upside down. Concentrate ony on light and dark forms.
- Analyse the work of several artists and their use of light and shade. (Cezanne, O'Keefe)
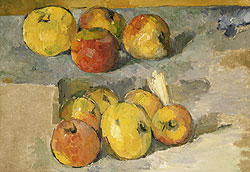
Apples, 187879
Paul Cézanne (French, 18391906)Oil on canvas; 9 x 13 in. (22.9 x 33 cm)
Observe the shadows and highlights on the fruit.
Some of these ideas may have whetted your appetite for a more comprehensive resource which teaches the Elements of Art one at a time. A curriculum which does this is Artistic Pursuits
- Home ›
- Homeschool Art ›
- Teaching Elements of Art

